Checked bags haven’t gone away, they’ve just become more expensive. Depending on your airline, your frequent flier status with the airline, what class of service you’ve booked, and how much you’ve paid for your ticket, the price for checking your bag can range from nothing on up to $50 per bag. And that’s not taking into consideration over-sized over over-weight bags that require special handling.
 Despite the fees, if I’ve packed for longer than a simple getaway weekend, I check my bags.
I hear the collective gasp go out among frequent travelers now!
But I have very good reasons for preferring to check my bags, and the primary one is that I have to tote and lift everything when I’m working, and I simply don’t want to do it the rest of the time. I love the freedom of carrying one medium-sized tote or briefcase, leaving my hands free and saving my shoulders from the weight of lifting and carrying. And for the record, in all my years of traveling, and checking bags, I have never had a bag go missing.
I’ve also never had an exorbitantly long wait in baggage claim, waiting for items to come tumbling onto the carousel. Yes, it can seem like a long time, but when I’ve checked my watch, I’ve found that the waiting time has usually been in the 5-10 minute range.
Keep these practical tips in mind and you can check bags stress free, if not cost free, as well as helping to ensure that they arrive when and where you do.
- Good luggage. It doesn’t need to be expensive, but it does need to be in good shape. Make sure that there are no rips or broken zippers, and that it is sturdy enough to withstand the journey. This will also help make sure that your contents stay inside the bag instead of getting spilled all over when a small tear becomes larger and the bag splits apart.
- Bag tags. Put a bag tag on the outside of your suitcase that has multiple phone numbers, including your cell phone or where you can be reached on your travelers. I have two bag tags on mine, just in case one gets torn off., and I also use bag tags that are brightly colored so that they can be easily spotted on my black bag that looks just like all the other black bags.
- Itinerary. Put a copy of your itinerary, along with your name, address, home phone, cell phone, and email, on the inside of the bag. You can put this information in an envelope and then pin the envelope to an inside pocket of the bag. You can also tape the envelope if you have plastic rather than mesh pockets. This is one more way to help the airlines find you if you are separated from your bag. Again, be sure to include a cell number or phone number where you can be reached. You can’t be reunited with a lost bag if the airlines don’t know how to get in touch with you.
- Tagged for final destination. make sure that the city code on the tag is the city code of your final destination. (Which means that you need to know your airport codes.) If you’re on a non-stop flight, this usually isn’t a problem, but occasionally, if you’re making a connecting flight, your connecting airport can inadvertently be tagged as your final destination. Double check, and don’t be afraid to ask if you’re not certain.
- Curbside check-in. If you are checking your bags with a porter, tip them. I know that you shouldn’t have to, especially now that there is a charge for curbside check in, do it anyway and chalk it up to putting good travel-karma out into the world.
- Match up your tags. Make sure that the tags on your bag and the tags that you are given match up. Confusion can happen if things are busy and if the people in line are getting cranky, because sometimes the tags will be set aside to be put on later. Don’t lose sight of your bag until the tags have been put on and the other half of the tag given to you.
- Baggage claim. After you get off the plane you don’t need to run to baggage claim. Take a minute and stop off at the bathroom, wash up the kids, or step out of the rush to make a phone call. Once you’re out of the crush of people, you can quickly head off to baggage claim away from cranky people.
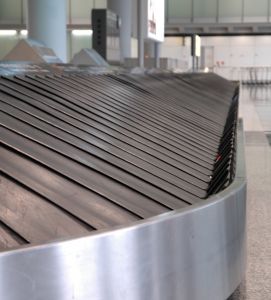
- Baggage carousel etiquette. Find the carousel where you bags will be arriving, recognizing that it might be different from the one announced on your plan upon landing. You don’t need to push and shove, the reason they call it a carousel is because it goes around in a circle. Find a spot where you can keep an eye on things and let everyone else climb on top of one another. Keep aware of your personal space at the carousel and leave room for others.
- Claim your bags. When the bags start rolling by, you’ll be able to quickly spot yours because you put that brightly colored bag tag on it. Lift it off the carousel and check to make sure that it is really yours. If you are waiting for another bag, make sure that you don’t block access to the carousel area with your already claimed bag.
- Claim checks. Keep your bag claim checks handy as you leave the baggage claim area. Some airports still match them up.
That’s all there is to it. A little thought in the beginning, a few practical considerations at the airport, and some good manners along the way. Before long, you’ll find that checking your bags isn’t all that bad. Well, except for those fees.
Photo credit: SXC


![51 Things to Do While Self-Isolating from the Corona Virus [with resources] Airplane interior](https://www.travelingwithmj.com/wp-content/uploads/2020/03/airplane-interior.jpg)
![Onboard the Viking Neptune: Iconic Western Mediterranean Itinerary [Review] IMG_9141](https://www.travelingwithmj.com/wp-content/uploads/2023/02/IMG_9141.jpg)
